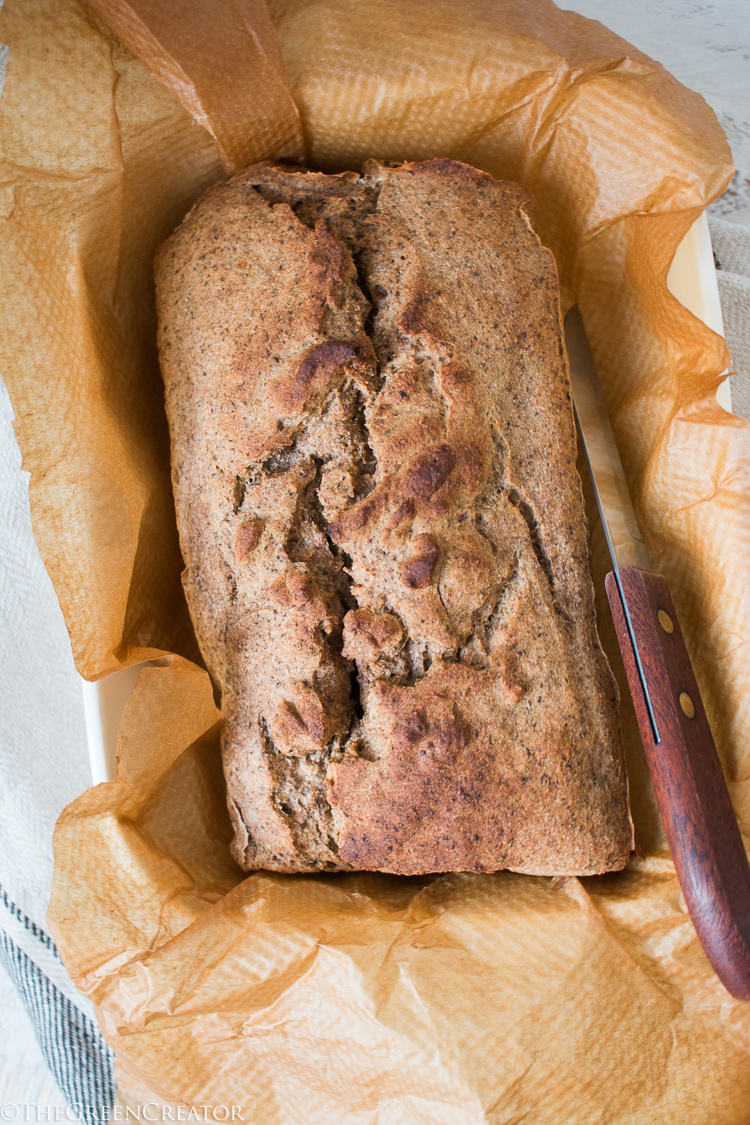
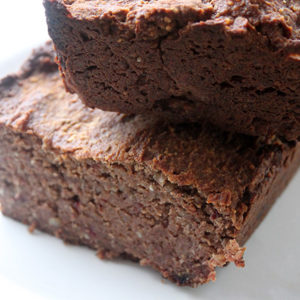
This buckwheat bread is as simple as soak, blend and bake. It’s nutritious and so delicious. This is the easiest completely vegan and gluten-free bread.
When it comes to making bread, whether that may be gluten-free or not I have to say I always get a bit intimidated. There is nothing in between when it comes to the art of making bread: it’s either a success or a failure. Unless you find of course a recipe that is so simple, it always works. That is the case with this nutritious bread recipe: the easiest buckwheat bread. You don’t need any gluten or yeast and also kneading is not a requirement for this recipe.
How to make buckwheat bread
The basic recipe requires just a few ingredients, but I can recommend adding the extra ingredients like I did for this recipe. I added nutritional yeast, herbs and fresh garlic and it gives this bread such a delicious flavor.
You could even turn this into a sweet bread if you wish. Of course this bread has a slightly different consistency than ”real” bread, but it does taste amazing and it goes great with anything.
I used my Vitamix for this recipe, but a food processor will also do the job. Since the buckwheat is soaked for at least a few hours the buckwheat will be soft and very easy to blend in a blender or food processor.
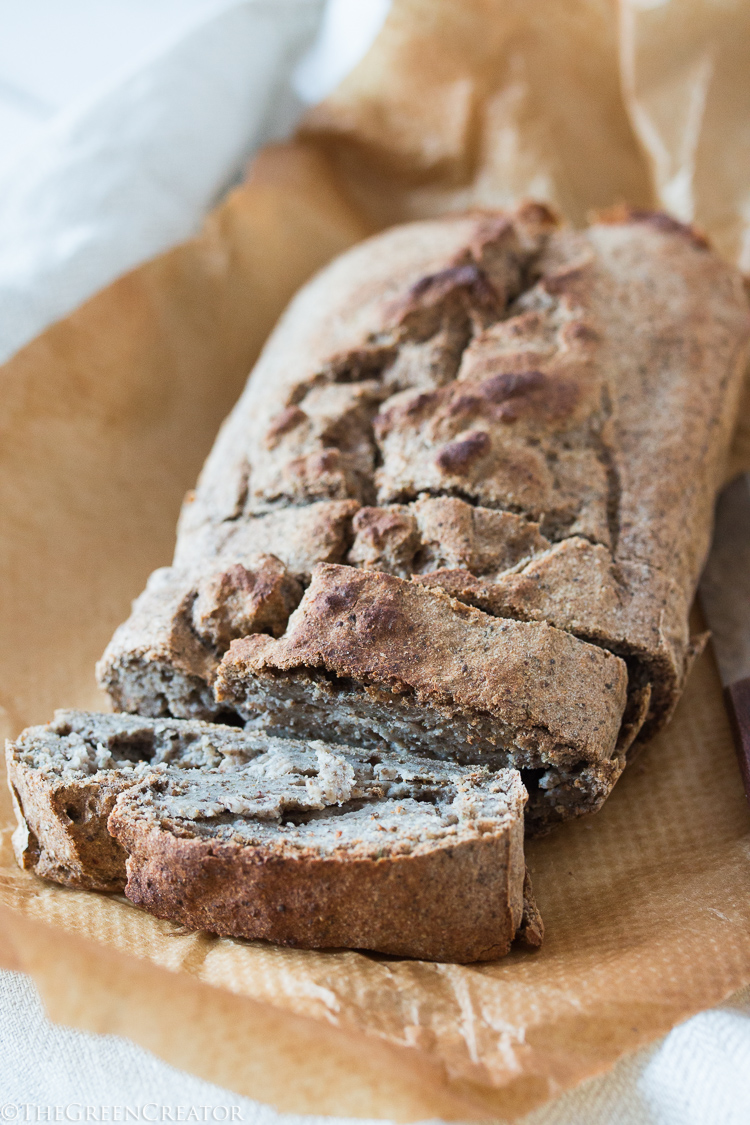
There is something so amazingly satisfying about baking your own bread. The smell of freshly baked bread out of the oven is everything. And when the bread has a crunchy golden-brown crust, it’s time for a happy dance.
And yes, I have to say making a completely vegan and gluten-free bread that comes out of the oven so delicious feels like a little triumph.
Baking tip
I learned that the key to making gluten-free bread is to skip the yeast and use baking powder instead. This means no kneading or any issues with bread that doesn’t rise.

This recipe is as simple as:
✓ Soak
✓ Blend
✓ Bake
I also dare to say this bread is pretty healthy. This bread contains mostly buckwheat which makes it so nutritious. And the soaking of the buckwheat only makes it easier to digest. And did you know that buckwheat is actually a seed?
I will for sure make this recipe many times! It’s so versatile! You can even use this recipe to make a pizza crust!
If you love bread and would like to try a gluten-free healthy simple version, I can recommend this recipe! Let me know what you think on Facebook or Instagram. Oh and don’t forget to tag your picture #thegreencreator on Instagram. I’d love to see your recreations!

Buckwheat Bread (gluten-free and no yeast)
- Prep Time: 20 mins
- Cook Time: 50 mins
- Total Time: 1 hour 10 mins
- Yield: makes 1 loaf 1x
- Category: vegan, bread, side, snack, starter, lunch
- Cuisine: bread, vegan, plant-based, dairyfree, gluten-free
Description
This buckwheat bread is as simple as soak, blend and bake. It’s nutritious and so delicious. This is the easiest completely vegan and gluten-free bread.
Ingredients
- 1 1/3 cup (220 gram) buckwheat, soaked in water 6 hours or overnight
- 1/4 cup ( 40 grams) chia seeds mixed with 4 tbsp water
- 1 cup (240 ml) water
- 2 tbsp nutritional yeast
- 2 garlic cloves, minced
- 2 tsp baking powder
- 1 tsp dried oregano
- 1 tsp dried basil
- black pepper, a few dashes
- 1/2 tsp salt (optional)
Instructions
- Soak buckwheat groats overnight in plenty of water or for at least two hours.
- Soak chia seeds in 4 tbsp water for 10 minutes until they form a gel-like consistency
- Preheat oven to 180°C (350°F)
- Drain buckwheat and rinse thoroughly.
- Add all ingredients to a food processor or blender and blend until it forms a thick batter. If batter is too thick add extra water.
- Pour buckwheat batter in a medium lined loaf tin (with parchment paper) and bake for 60-75minutes at 180°C / 350°F.
- Bake until just brown on top then remove from the oven, take the bread out of the tin, and return to the oven for another 30 min (this will create a crunchy crust). The bread is done when it is golden brown and sounds hollow when tapped
- Place bread on a cooling rack and allow to cool completely before slicing.
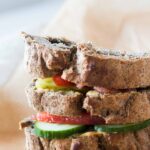
- Enjoy fresh or toasted for up to 5 days. Store any slices you will not eat within 5 days in the freezer as they will go stale quickly with no preservatives.


Would buckwheat flour also work for this recipe you think?
Hi Anouk,
I’m not sure. I think you would need less flour and I think it will create a different texture of the bread. But it’s sure worth trying out! 🙂
Best,
Bianca
Can you use bread machine with multi grain setting?
Hi Ed,
I think this recipe is too simple to use a bread machine 🙂
Best,
Bianca
My bread did not rise and was gooey in the middle.
Hi Jodie,
This bread is not supposed to rise really that much. The gooey in the middle might have to do with the oven settings. Maybe too hot too quick?
Makes sense
Thank you
Respectfully
Ed
I thought there wasn’t any yeast in this recipe,but it says nutritional yeast. Can I skip the yeast?
Hi P,
This is not the yeast as used in bread…far from it.
There is no rising and kneading involved as with yeast.
You can read more about nutritional yeast here:
https://thegreencreator.com/nutritional-yeast-seasoning/
Since it is a seasoning you can skip it in this recipe.
Hope this helps.
Best,
Bianca
Do i have to soak the buckwheat again if I already soaked sprouted, dried them already? Thanks
Hi Tina,
No, you don’t have to do that again:)
Best,
Bianca
I was really looking forward to making this bread but, despite following the recipe and adding all the ingredients apart from garlic cloves, it tasted vile! What is it supposed to taste like? And the “bread” came out so small (hadn’t risen at all) that there’s no way you could make a half decent sandwich out of such tiny slices! Any ideas on what might have gone wrong please? All my ingredients were freshly bought so no issues with anything being out of date.
Hi Angela,
I’m so sorry to read that.
It is as close to ”real bread” as it can be, but it’s not real bread. So it won’t rise as much as real bread, just a little.
So maybe you spread the loaf out too much? A smaller loaf tin can help.
Taste wise: garlic is big game changer and perhaps adding more spices you like, to make the taste pop will help.
Hope this helps!
Best,
Bianca
There is no ride because there is no gluten to trap and hold the CO2 gas. This gluten-free “bread” is essentially savoury cake.
Hi Yves,
Yes, it is totally gluten-free, but it taste NOTHING like cake 🙂 I hope you will give it a try.
Best,
Bianca
is it possible to use kasha (roasted buckwheat) instead of buckwheat?
Hi Jolina,
Yes, that should be very delicious too! 🙂
I just made this bread and it tastes yum! The texture is a little odd, soft but looks rubbery? I don’t mind as it tastes really good and is crispy on the outside I’m just wondering if I got the texture wrong or if it is meant to be a litttle odd?
Hi Jessica,
It could depend on the type of buckwheat you used… It should be moist in the centre but not soft or rubbery. The outside should be crispy.
Maybe you could give me more information so I can help you out for next time.
Best,
Bianca
I thought this was yeast free?? Nutritional yeast is still yeast for those who are allergic. ????
Can this be made without the nutritional yeast?
Nutritional yeast is not the yeast like in bread 🙂 But in case of being allergic, you can just leave it out. It’s just for taste in this recipe.
Hi – I just made this. It is good! I have to work on my baking skills as it came out a bit mushy inside – not bad though. I also did not have any nutritional yeast, and I bet that would be delicious. I used too long of a pan, so it came out more narrow at the ends and not that thick. BUT, I really like it. I put some nut cheese spread on it and it was yummie. The flavors really complimented each other. I’ll be making this again, but adding nutritional yeast and using a smaller pan. Thank you so much for the wonderful recipe!
Hi Anissa!
I’m so glad you love this recipe too 🙂
And yes, a smaller pan will work much better next time.
Best,
Bianca
Hi,
Can I delete the chia, I am allergic.
Hi Terry,
Yes, you can use ground flax seeds instead.
Best,
Bianca
Hey
Assuming 180f is for a convection oven? So a fan oven should be adjusted accordingly? Just made this recipe on 180f with a fan oven and it’s crusty on the outside but doughy in the middle. Inedible. So assuming too hot to start with? I realised part way through. Thank you
Hi Hannah,
That is such a pity! I’m sorry. Yes, every oven works differently. I think it’s best to check every 20 minutes and see how long this recipe will take in the oven you have.
Best,
Bianca
Do you think doubling the recipe for a larger bread will work?
Hi Sheri,
Yes, that should work:)
Best,
Bianca
Bianca, thanks a lot for this recipe! I made an ultra easy version of this but followed the principles of your recipe. I simply soaked the buckwheat for 24 hours, added some millet and mixed seeds, some spices, and then baked it. It came out really good and I really loved it. I enjoyed the bread for a week and each time it was delicious. Thank you so much. It’s so much better than buying gluten-free bread for so many reasons and I can make so many variations of it!
I’m so glad you liked it Kasia 🙂
Hi! Do you think I could substitute organic buckwheat flour?
Hi Jennilynn,
Yes, that should work, but you might want to try to use less than in the recipe.
Best,
Bianca
My grandmother used to make a batter with buckwheat flour, and bake it in a very hot oven. It was like pita bread, and would make a crust on top and bottom and separate some in the center. It’s an old Acadian recipe, It was mixed the night before and bake for breakfast. Any on heard or has the recipe? It would be greatly appreciated.
Made this using buckwheat flour and no seasoning. The taste was overwhelming. Toasted the bread next day lightly and made sandwiches. Delish!
Thank you so much for the feedback Emm! So happy you love it too!
not quite a 50min baking time though! totally interrupted my schedule as it’s more like 105 minutes!
Hi Kate,
I’m sorry to read that. Every oven heats differently. Some take a bit more time, others less. But 105 minutes seems very extreme to me though. Perhaps you could try to heat it a bit higher as your oven may not be able to reach the temperature as I mentioned in the recipe?
Bianca, this sounds like an amazing recipe and I cant wait to try it
Grappig… als je de ‘scale it up’ knopjes gebruikt om de ingredienten voor meer porties te berekenen, veranderen in het Nederlandse recept alleen de ‘kop’ hoeveelheden . Wat in grammen tussen haakjes staat verandert niet. In het Engelse recept veranderen die wel mee 🙂
Groetjes,
Jo
Hi JoAnne,
Oh ja, klopt! Ik zal proberen dit aan te passen 🙂 Dank je wel!
Groetjes,
Bianca
This looks so good! What a great alternative to a gluten free loaf!
This looks so good! What a great way to still enjoy bread without the gluten!
Thanks for sharing! Does it keep long?
Hi Vanessa,
Good question. If you cover the bread it should last about 2 days. But after that you can slightly wet the bread and reheat it to enjoy for another 1-2 days.
You can store it in the fridge, and it will keep longer.
This looks so good! What a great way to still enjoy a snack by switching up a few things!
Thanks for sharing! Does it freeze well?
This recipe is so simple and delicious! But you need to know your oven. Too high and placed too high it doesnt bake well. But secodn time, same recipe, was amazing! Thank you!
Bianca,
Lovely and simple recipe. The first two times I made it I used a bit too much water possibly and was a bit mushy on the inside but I sliced a few slices (while warm) and then continued baking at maybe 250 for another 20-30 minutes. It ends up being crusty on the outside and then a bit soft on the inside on the bottom.
I added sesame seeds, almonds and sunflower seeds to make it adventure bread.
The other times, I baked for 1 hour 20 minutes at 350 in the tin and then another 30 minutes outside of the tin. It’s still a bit moist-like but not gooey.
Another trick is to leave in the oven for another 10-15 minutes while hot but turned off to have it cook more on the inside. My oven bakes reasonably well for other recipes. It is sometimes just hard to get things fully cooked that are gluten-free.
Thank you so much for the feedback and amazing tips Stephanie! 🙂